Product Photography in a Hired Studio: How to Plan, Light and Shoot Like a Pro
July 13, 2026
Hi, and welcome. Product photography has a reputation for being the technical cousin of portrait work, all light tents and fiddly reflections. But here is the truth we have learned from watching so many makers, marketers and photographers shoot in our space: with a controlled studio environment and a simple plan, beautiful product images are within anyone’s reach.
At Desk and Studio, we see everything from ceramicists photographing a new collection to small brands building an entire online store in a single afternoon. So we have gathered our best advice into this guide to shooting product photography in a hired studio, from planning your session to nailing the light.
Why a studio changes everything for product work
Products are unforgiving subjects. A portrait subject can turn towards the light; a bottle of olive oil cannot. That is why control matters so much, and control is exactly what a studio for product photography gives you.
Consistent light means every item in your catalogue matches, shot after shot, whether you photograph them in one session or across several. Clean backdrops mean your product is the hero, with no distracting clutter. And having proper room to work means you can set up a small styling station, keep products organised, and move through a long shot list efficiently. If you are still weighing up spaces, our guide on how to choose the right photoshoot space in Sydney is a helpful companion read.
Planning your product shoot before the day
An hour of planning saves three in the studio. Here is what to prepare.
- Write a complete shot list. List every product, every angle and every variation you need. E-commerce usually wants a front view, back view, detail shots and a lifestyle frame per product. Multiply that by your product count and you will know exactly how much studio time to book.
- Gather references. Screenshot product images you admire. They will answer most styling and lighting questions before they come up.
- Prepare the products themselves. Clean everything twice. Dust, fingerprints and creased labels are painfully visible in a sharp studio image and tedious to retouch out.
- Pack your styling kit. Props, plinths, fabric, tape, scissors, cleaning cloths and gloves for handling reflective items.
- Decide your background strategy. Pure white for marketplace listings, a coloured paper roll for brand and social content, or styled surfaces for lifestyle shots. Many brands shoot all three in one session.
A simple lighting setup that just works
You do not need a complicated rig for polished product images. This is the setup we suggest to most people starting out.
Begin with one large, soft key light, such as a softbox, placed at roughly forty-five degrees to the product and slightly above it. Soft light wraps around shapes and keeps reflections gentle. Then place a white reflector board on the opposite side to lift the shadows. For most products, that is already a professional look.
From there, refine to taste. A second light skimmed across the background separates the product from the backdrop. A grid or snoot can add a crisp highlight to glass or metal. And if you are shooting on pure white for e-commerce, light the background separately so it stays clean and bright.
Reflective products like jewellery, glass and bottles deserve a special mention. The secret is to light the surfaces they reflect, not the product itself. Large soft sources and careful camera placement will save you hours of frustration.
Styling tips that lift an ordinary product shot
Light gets you a correct image; styling gets you a compelling one.
- Give the product breathing room. Resist the urge to fill the frame edge to edge. Negative space feels premium.
- Use odd numbers. Groups of three or five products almost always compose better than pairs.
- Add scale and context carefully. A single prop, like a linen cloth or a sprig of greenery, tells a story. Five props tell a mess.
- Mind your surfaces. A textured tile, a timber board or a stone slab under the product adds instant depth to lifestyle frames.
- Shoot tethered or review large. Check focus and reflections on a big screen as you go, because a phone-sized preview hides a multitude of sins.
Making the most of your studio hire
Batch similar setups together so you are not rebuilding your lighting for every product. Shoot all your white-background frames first, then move to the styled looks. Keep a running checklist and tick off each product as you go, because nothing stings like discovering a missed item after you have packed down. And leave a little time at the end for experiments: some of the best brand images happen once the must-have list is done and you can play.
If your product work sits alongside building your own brand presence, you might also enjoy our guide to planning a content or personal branding shoot in a Sydney studio.
Frequently Asked Questions
Do I need professional equipment to shoot products in a hired studio?
No. A camera you know well, one soft light source and a reflector will produce excellent results. At Desk and Studio you can dry hire lighting and backdrop packages with your booking, so you do not need to own any studio gear.
How much studio time should I book for a product shoot?
As a rough guide, allow ten to fifteen minutes per product for simple e-commerce angles once you are set up, plus setup and pack-down time. A half-day session comfortably covers most small catalogues.
Can I shoot product photos with natural light in a studio?
Absolutely. Our Petersham studio is full of natural light, which is gorgeous for lifestyle product frames. Most brands combine natural-light styling shots with controlled artificial-light catalogue shots in the same session.
What backdrop is best for product photography?
Seamless white paper is the standard for online stores, because it is clean and consistent. Coloured paper rolls and textured surfaces work beautifully for social and brand campaign imagery.
Where can I hire a studio for product photography in Sydney?
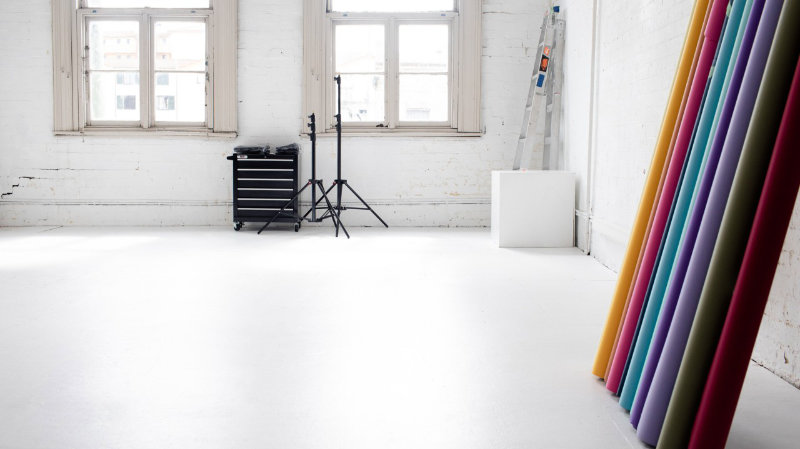
Right here. Desk and Studio is in Petersham, in Sydney’s Inner West, with natural light, paper roll backdrops, dry hire equipment and a green room to keep everything organised on the day.
Ready to make your products shine
Every product has a best angle and a story worth telling well, and a controlled studio space is where you find both. At Desk and Studio, we love watching brands and photographers leave with a memory card full of images that genuinely lift their business.
Ready to give your products the shoot they deserve? Book now and come create with us in Petersham. We will have the space, the light and the coffee waiting.
More Articles
- Product Photography in a Hired Studio: How to Plan, Light and Shoot Like a Pro
- Choosing Studio Lighting to Rent: A Photographer's Guide to Lights, Modifiers and Backdrops
- Your First Studio Photography Shoot: A Beginner's Guide
- Photography Studio Rental in Sydney
- Photography Workshops in Sydney and How to Choose One
- How to Find a Photo Studio Near You in Sydney
- Photo Studio Hire in Sydney's Inner West
- How to Choose the Right Photoshoot Space in Sydney
- Self-Shoot Studios: How to Take Your Own Photos in a Hired Space
- How to Hire a Studio for a Boudoir or Portrait Shoot
- How to Hire a Photography Studio in Sydney: The Complete Guide
- How Much Does It Cost to Hire a Photography Studio in Sydney?
- Hot Desk & Creative Coworking in Sydney's Inner West
- Hiring a Video Studio in Sydney: Green Screen, Lighting and Sound
- Dry Hire Explained: Renting Studio Lighting & Backdrops in Sydney
- Planning a Content or Personal Branding Shoot in a Sydney Studio
- Click, Learn, Repeat: A Photographer’s Growth Guide
- The Power of Versatility: Mastering Natural and Studio Light in Photography